Flooring Finesse: Secrets to a Successful Solid Wood Floor Installation

Installing solid wood flooring is a rewarding endeavor that adds warmth and timeless beauty to your home. Follow this comprehensive step-by-step guide to ensure a successful installation that stands the test of time.
Step 1: Gather Your Materials and Tools
Before you start, make sure you have all the necessary materials and tools. This includes:
- Solid wood flooring planks
- Saw
- Spacers
- Mallet
- Tape measure
- Safety equipment
You may also need:
- Adhesive (glue down installations only)
- Nail gun (nail down installations only)
- Underlay (floating floor installations only)
- Moisture barrier (a great addition for moisture-prone areas)
Step 2: Prepare the Subfloor
Ensure that your subfloor is clean, dry, and level. Repair any imperfections, remove old flooring, and install a moisture barrier if needed. A level and even subfloor are essential for a smooth and lasting installation.
Step 3: Acclimate the Wood
Allow the solid wood planks to acclimate to the room's temperature and humidity for at least 5-7 days. Stack the planks in the room where they will be installed, leaving space between each stack for air circulation.
Step 4: Plan the Layout
Plan the layout of your flooring, considering the room's dimensions and the best orientation for the planks. This step is crucial for achieving a balanced and visually appealing result. Consider the installation pattern, especially if you are opting for a specific design like herringbone or chevron.
Step 5: Install the Underlayment
If your solid wood flooring requires an underlay, install it according to the manufacturer's instructions. Underlay can sometimes be required to provide additional insulation and reduce noise.
Step 6: Install the First Row
Begin installing the first row of planks along the longest exterior wall, leaving a 1/2-inch gap between the plank and the wall for expansion. Use spacers to maintain consistent gaps along the perimeter.
Step 7: Nail or Adhere the Planks
Depending on your chosen installation method, either nail the planks to the subfloor using a nail gun or adhere them using the recommended adhesive. Follow the manufacturer's guidelines for spacing and nailing patterns.
Step 8: Continue Installation
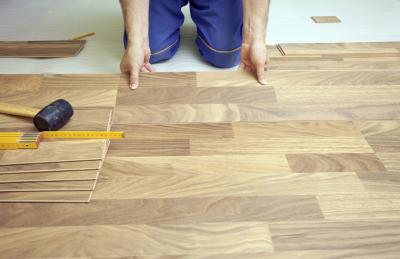
Continue installing subsequent rows, ensuring staggered seams for a more stable and visually appealing result. Use a mallet and wood block to snugly fit the planks together, maintaining the proper gaps.
Step 9: Cut and Fit Planks
As you approach walls or obstacles, measure and cut planks accordingly. Use a saw to achieve precise cuts, and leave the necessary expansion gaps.
Step 10: Install the Last Row
Measure and cut the final row of solid wood flooring to fit against the opposite wall, ensuring a uniform gap. Use a pry bar if needed to snugly fit the last row in place.
Step 11: Install Transition Strips
If transitioning to another type of flooring or between rooms, install transition strips to provide a seamless connection.
Step 12: Finish with a Protective Coating
Once the installation is complete, apply a protective finish to the solid wood flooring. This could be polyurethane, oil, or another suitable finish. Follow the product instructions for application and drying times.
Step 13: Clean Up
Remove spacers, clean the floor thoroughly, and admire the beauty of your newly installed solid wood flooring.
Congratulations! You've successfully completed the installation of your solid wood flooring, transforming your space with enduring elegance and natural beauty.


